We follow our PimpMyBurp series with a new article about an extension known by many hunters but still (too) rarely used, AutoRepeater. If you use Burp Suite for your hunting session, you probably already know the “match & replace” feature. This one is useful, but with the AutoRepeater add-on, you can extend the possibility of automation to focus more on research and exploits.
The current “match & replace” functionality in Burp Suite works fine and can do the job in many cases. But when you need to go deeper in your testing phase, you are limited to some basic features. We will try to see how we can improve this!
How to install AutoRepeater?
The plugin is available on BApp Store but we recommend downloading and installing it directly from the GitHub repository which have a more recent version: https://github.com/nccgroup/AutoRepeater.
Once you have downloaded the package, unzip it. Now, open Burp Suite: Extender > Extensions > Add > Select file… and choose AutoRepeater.jar. After the installation, you should see a new tab, we can now start to use the plugin!
How to use AutoRepeater?
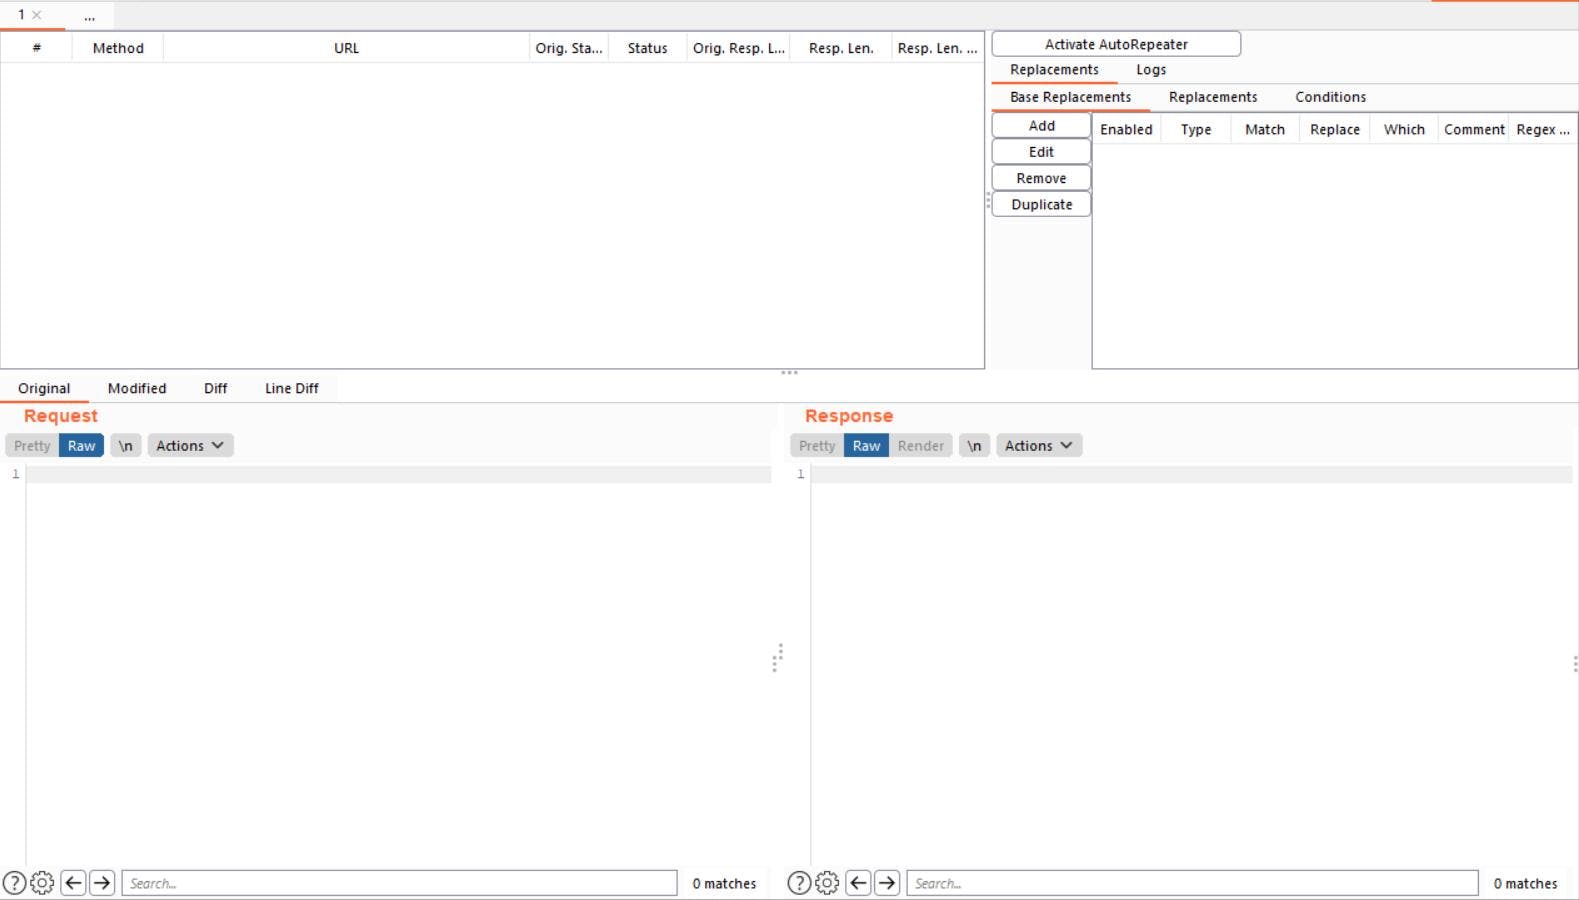
The interface is pretty clear and we rapidly understand how this plugin works:
- Replacements Tab:
- Global Replacement: request header, body, param name, but also, cookie name, cookie value, string, first line, remove parameter by name, by value, matching param name and replace value…
- Replacements: same options as global replacement
- Conditional replacements: boolean operators, multiple match type (domain name, HTTP method, protocol, file extension, URL, sent from tool… and many more)
- Logs Tab:
- Log Filter: add a filter to show only interesting requests with a specific behavior in your testing process (filter can be applied on URL, request header, request body, file extension…)
- Log Highlighter: adding colors on specific requests which match with a string, request, param, extension, HTTP method…
- Left Side:
- Your requests
- Replayed requests
- Original status code
- New status code for replayed request
- Original response length
- New response length
- Length diff between the two requests
- Bottom:
- Request & Response viewer with original and modified request
- Diff between (for requests and responses)
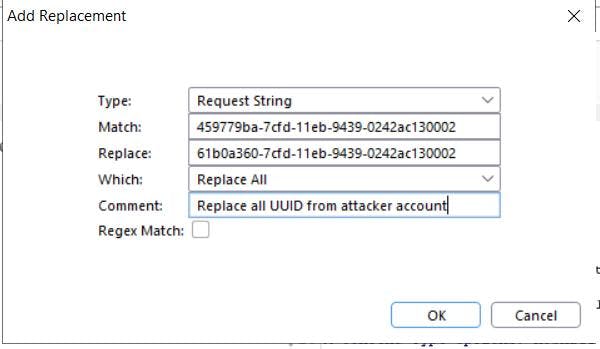
Let’s imagine we have a target with a UUID or an userId: as a hunter with eagle eye, you will probably want to test if two accounts can use or access the IDs from another account, and vice versa. Depending on your target, these IDs can appear multiple time in your requests, so when you want to test IDOR and Improper Access Control bugs, you will perform multiple tests by replacing all IDs or just the first one.
How to do thin on AutoRepeater? Add a new Replacement and select the type of string that you want to replace in “Match”. Choose the value that you want to replace. Select “Replace All” or “Replace First” to choose the replacement mode. And that’s all.
Be as creative as possible, here are examples of which rules can be created:
- Add new headers (x-forwarded-for, x-forwarded-host, origin…),
- Remove authentication header or cookie (JWT for example),
- Replace value like user to admin, false to true,
- Add JSON parameters,
- Change HTTP Method (PUT to POST or vice versa),
- Add GET or POST parameters,
- Add .old or .back to files extension (.php.old, .jsp.old…),
- Remove CSRF token,
- Math parameters for Open Redirect, reflected XSS or SSRF
- Try to bypass “403 Forbidden” by adding specific headers or things like “.;/” in URL
- Chain AutoRepeater with Hackvertor extension
- And many more…
To keep in mind: for each replacement configured in AutoRepeater, a new request will be generated, this can therefore quickly become unreadable. Luckily, there is a feature to highlight requests, and this is what we will see right now.
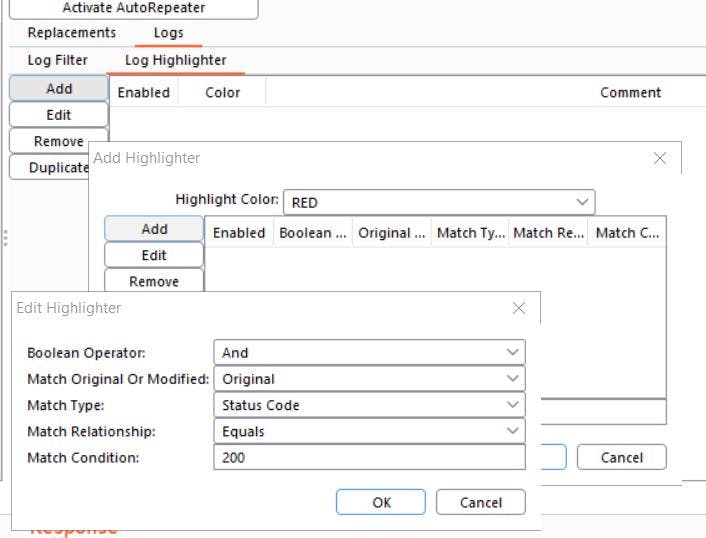
Log Highlighter & Log Filter
AutoRepeater has a “Log Highlighter” feature which can be used with conditional match, to highlight only what you exactly want. For example, only match “200 OK” status or if HTTP method is “PUT” or “POST”. To configure this, go on Logs tab and Log Highlighter click on Add. You will be able to configure a new rule with specific match conditions.
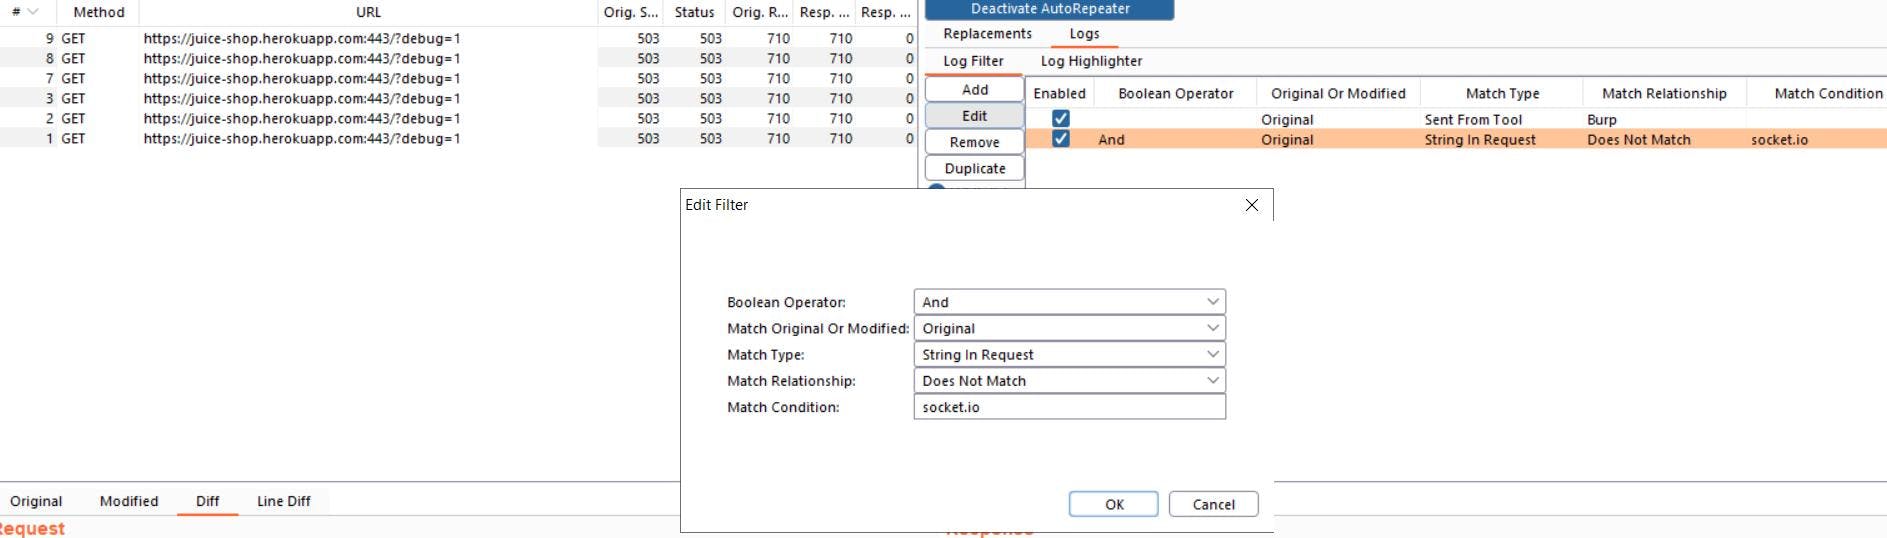
The “Log Filter” feature can be used to have a clearer view on your requests. As others features, you can add a new rule but with a “Blacklist” or “Whitelist” mode.
Now all you have to do is go ahead and test your rules on your favorite target. I hope you liked this article and realized the potential of this plugin! Enjoy!
External references